


blaster58
-
Posts
10 -
Joined
-
Last visited
Content Type
Profiles
Forums
Updates
Release Notes
Store
Posts posted by blaster58
-
-
hace 2 horas, DPI Wizard dijo:
Did if feel too fast or too slow? If too slow, try with MDV 100% instead, or 177.7778%
Is that the configuration?
-
hace 1 hora, DPI Wizard dijo:
You should try with everything set to the default in the calculator first and see how that feels.

I already did it like this but I don't feel good with that feeling close or far away. I'm sorry, does it depend on the monitor? my monitor is 19.5 and it is 1366 x 768
-
hace 24 minutos, DPI Wizard dijo:
That depends on what you are trying to achieve.
Could you help me please? I just want a good sens, I want for ads and scope, could you give an example? Sorry, I don't understand the previous examples you gave.
-
hace 27 minutos, DPI Wizard dijo:
In what example?
Did I move the scale or does the scale not have to move?
And the percentage in 101 and 366 is correct or not?

-
Justo ahora, DPI Wizard dijo:
Mi español no es tan bueno por favor escribe en inglés.
")
De cualquier manera, los porcentajes son relativos al campo de visión y la sensibilidad del hipfire. Entonces, si cambia cualquiera de ellos, necesitará un nuevo cálculo para ADS .
I don't understand, what I want to know is what percentage is used in the example
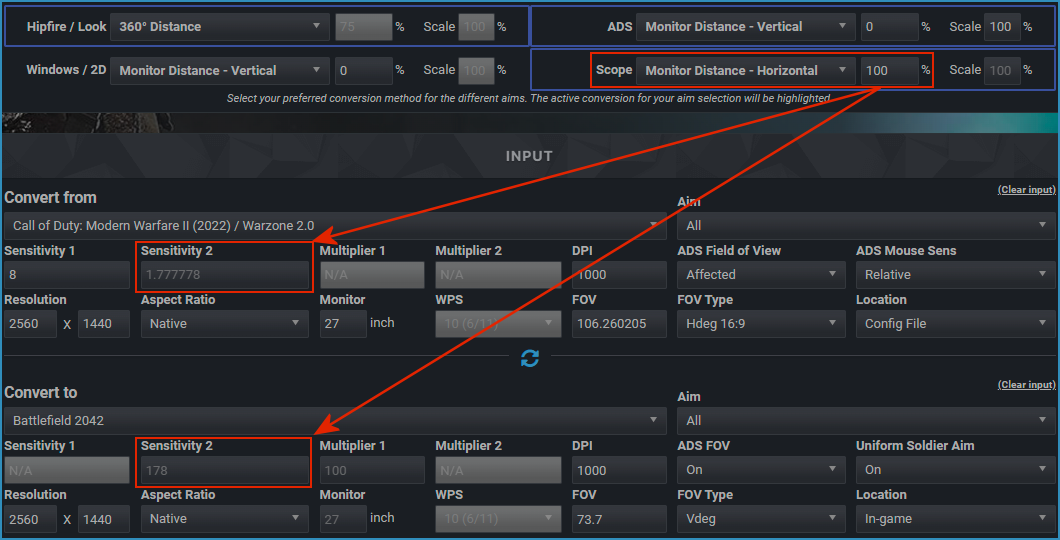
ads : monitor distance horizontal: 100% scale: 100%
scope: monitor distance horizontal: 100% scale: 100%
What are the true percentages given that example?
-
En 4/4/2021 a las 14:04, DPI Wizard dijo:
Si lo has configurado en 110 en el juego, simplemente revisa el archivo de configuración para ver el valor de cl_fovScale (debe ser 1,55).
Could you please answer me, I am a Premium member anyway.
-
hace 40 minutos, DPI Wizard dijo:
Eso depende de lo que prefieras. 0% hace coincidir la misma velocidad de seguimiento entre telescopios, mientras que 100% hace coincidir la distancia de movimiento hasta el borde del monitor.
¿Quiero uno lento en los anuncios y la escala porcentual siempre será 100? o se cambia
it is for the game apex legends
I put the configuration that you published which was in ads 101% and scale 77% and in scope you set 366% and scale 60 That's why I wanted to ask if the percentage changes.
For example I use 1800 dpi and in sense for the game Apex 1.01.
So what would the sensitivity be like in the ads and the scope with the scale?
-
En 21/12/2019 a las 14:47, DPI Wizard dijo:
Sí, eso es correcto para mantener MDH al 100%.
Could you explain to me what percentage I should use for ads and scope?
-
En 13/12/2019 a las 10:39, DPI Wizard dijo:
Calculator Settings
Layout

The layout of the Calculator Settings can be adjusted using the buttons on the right side of the Calculator Settings header. The available options are:
-
 - Stacked: This option stacks all the elements vertically with a defined maximum width.
-
 - Grid: This option aligns the Calculator Settings and Input side by side, and places the Calculations and Game Info sections side by side below them. This layout will use the full available width.
-
 - Full Width: This option is like Stacked, but with no maximum width.
Note that the layout options are only visible when the horizontal resolution of the window is above a certain size. If the window is too small, the layout will automatically switch to Stacked.
The selected layout is stored in your browser, not in your saved entries.

In addition to this you can collapse the sidebar by clicking on the three lines located in the top navigation bar to make more room for the calculator.
Once collapsed, the three lines will turn into an arrow which can be clicked to expand the sidebar again.
Additionally, you can choose between five different themes by using the theme-picker located next to the sidebar collapse button. The theme-picker offers two dark and three light themes for you to choose from. Select the theme that best suits your preference by clicking on it.Saved entries
This is a list of all the entries you have saved. This is only available for Premium Members. You can control these entries using the following buttons:-
 - Load the selected entry. Entries will also be automatically loaded when you select them.
-
 - Save all entered data to the selected entry.
-
 - Add a new entry. Check the "Default" box to set this input as the one that loads by default when you open the calculator. Any previously set "Default" boxes will be unchecked to ensure that only one input is active.
-
 - Edit the selected entry to change name or select it as the default to load.
-
 - Permanently delete the selected entry.
-
 - Create a link to share the current calculation with others.
Mode
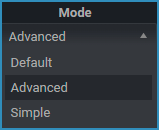
The sensitivity calculator has three modes: Default, Simple, and Advanced. Default and Advanced modes have the same options available, but the latter displays more information in the calculation output. Simple mode hides many options and uses predefined values. Here's how it works:
Any fields that can be locked to a default value will be hidden in Simple mode. Additionally, the Auto FOV function is disabled, and secondary sensitivity and multiplier fields use the game's default values.
Please note that some conversions may not be possible in Simple mode since the secondary sensitivity and multiplier fields are hidden and forced to default values. WPS is locked to 10 (6/11), and special options are locked to a pre-selected setting, which will be displayed in the output. FOV Type is also locked to the game's native FOV type.
For Normal conversions, 360 distance is used. ADS, scope, and Windows / 2D conversions will use MDV 0%. The output in Simple mode is simplified to show only the sensitivity, 360 distance, config FOV, and special options.
When switching back to Default or Advanced mode, all the Simple mode settings are retained.
Units
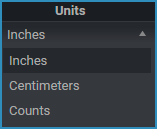
Select the unit of measurement (inches, centimeters, or counts) to use for both distance input and calculation output. Changing this setting will not affect the monitor size input, as inches are commonly used for this measurement worldwide.
Conversion Source
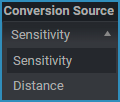
You can base your calculation on either the existing sensitivity from a game or a specific distance.
If you choose to use sensitivity, you must fill in all of the unlocked sensitivity and multiplier fields for the game you are converting from. This will serve as the basis for all conversions.
When using distance, the "Multiplier 2" field will change to a distance field. This field can be either in centimeters, inches, or counts depending on your unit selection. Enter your desired 360 distance, and the calculator will use this as the basis for all your calculations. For 2D games and Windows, enter the distance you want to move your mouse to move the pointer from edge to edge for horizontal conversion methods or top to bottom for vertical methods.
The red text will indicate whether the distance you enter is for 360 distance:

Or for 2D movement:

Sort By
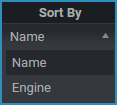
You can change how the list of games is sorted in two ways:
- Name - Sort alphabetically by game name
- Engine - Grouped by the game engine they use, then sorted alphabetically
If you choose to sort by game engine, you can also search for specific engine names.
Y Sensitivity
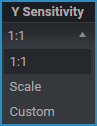
If you prefer a different vertical sensitivity than horizontal sensitivity, you can configure it by defining a desired Y sensitivity. This option will only have an effect on games that support a different vertical sensitivity. You have three options for configuring this:
- 1:1 - This is the default setting and maintains the same 360 distance for the vertical axis, resulting in a 1:1 ratio.
-
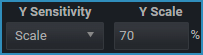
Scale - This unlocks the Y Scale field where you can enter your desired Y sensitivity scale. For example, if you enter 70%, the Y sensitivity value will be 70% of the X sensitivity, resulting in a longer/slower 360 distance.
-
Custom - This option lets you set the preferred Y sensitivity for each aim category. The available options for the Y Axis are the same as those for the X Axis.

Auto FOV

This function helps you achieve the same FOV in every game. It automatically calculates and fills in the target FOV for the game you select. If Auto FOV is set to "On", the Target FOV and FOV Type fields will be enabled, allowing you to enter your desired FOV value.
When you change the Target FOV or FOV Type, the calculated FOV for the game will be filled in and overwrite any previous FOV value you entered.
To prevent invalid calculations, the Target FOV is calculated using both the minimum and maximum FOV values, with correct rounding. This ensures that the calculated FOV is as close as possible to your target FOV.
-
If the target FOV is below the minimum value, the minimum FOV will be used, and a message will be displayed:
FOV is set to minimum as target FOV is below minimum. -
If the target FOV is above the maximum value, the maximum FOV will be used, and a message will be displayed:
FOV is set to maximum as target FOV is above maximum. -
For games that have not yet been updated with a valid FOV range, the following message will be displayed. This means you will need to manually check whether the calculated FOV is valid:
FOV range unknown, verify that the calculated Config FOV is valid! -
If a game has a locked FOV, you will receive a message indicating that the target FOV could not be matched:
FOV is locked, unable to match target FOV. -
Finally, for games that require a mod to set the FOV, this message will be displayed:
A mod is required to set this FOV!
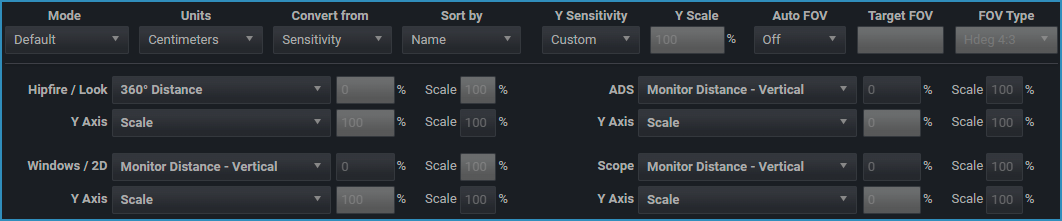
Conversion setup

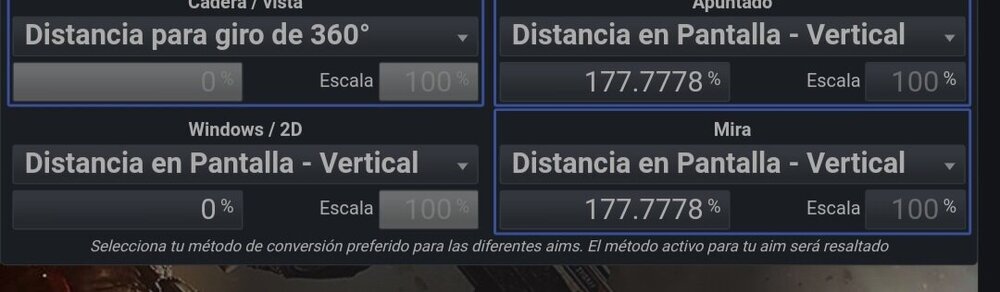
You can configure which conversion methods to use for different aims in this section. The idea behind this feature is to avoid changing conversions depending on what you are converting. This conversion mapping is also necessary to handle multiple simultaneous calculations using the "All" aims.
The active conversion method(s) for your selection will be highlighted in blue. There are four categories available:
- Hipfire / Look - Hipfire, look or default sensitivity.
- ADS - Aim down sights, targeting, ironsight, holo, red dot, reflex etc, and scopes less than 2x zoom.
- Scope - All scopes that are more than 2x zoom.
- Windows / 2D - Windows and 2D games like osu and LoL.
Percentage field

The conversion method selection is followed by a percentage field, and this field will only be enabled if a Monitor Distance conversion method is selected. For more info about this field, see the MDH section.
Scale/Power field


This field is only enabled for ADS and Scope using a Monitor Distance conversion method, and for the Y Axis using Scale.
For MDH, MDV and Scale his field will be labeled "Scale", and the sensitivity will directly scale to this value. For instance will 50% scale the sensitivity to twice the distance. This value has to be above 0.
For MDD the field will change to "Power", and the value will work as an exponent for the conversion. Also this value has to be above 0.
Conversion methods
There are nine different conversion methods to choose from:360° Distance

This will calculate the distance you need to move your mouse to do a full 360-degree rotation. This conversion method is most commonly used for hipfire/look and sometimes for targeting/ADS. However, using it for more powerful scopes will make them very sensitive and may make it difficult to aim precisely.The advantage of this conversion is that you will have the exact same movement for navigating around, such as turning 90 degrees around a corner or 180 degrees to look behind you. The drawback is that precisely aiming at something on your screen will be different depending on your FOV. This conversion is not available for Windows or 2D games.
The percentage and scale fields will be locked when using this conversion method, as they do not apply to it.Monitor Distance - Horizontal (MDH)

This conversion allows you to match your mouse movement exactly to a specific point on the horizontal axis.
Setting the MDH percentage to 0% means that the speed of tracking a moving target will be the same.Setting the MDH percentage to 50% means moving the crosshair to aim at 50% of the distance between the crosshair and the edge of the monitor is the same.
Setting the MDH percentage to 100% will match the movement to aim at something at the edge of the monitor.
Anything above 100% is an imaginary spot beyond the edge of the monitor. So for instance, 200% means a spot twice the distance from your crosshair to the edge of the monitor.
- This calculation will be affected by the change of the Actual HFOV of the aim you have selected.
- You can also use negative values like -100%, which reverse the difference between 0% and 100% to calculate the same scale backwards.
- Scale will add a scaling factor to the conversion. For instance, 90% will make all conversions 10% shorter (i.e. slower).
- You can enter "auto" in the percentage field instead of a specific value. This tells the calculator to use the relationship between the input FOV and output FOV as the monitor distance. For example, when converting from 90 to 45 degrees, the result will be 50%. When converting from 120 to 30 degrees, the result will be 25%.
Monitor Distance - Vertical (MDV)

This is exactly the same as the horizontal monitor distance, but is instead using the vertical FOV. This is the method used by games like the Battlefield series with their USA setting and the Call of Duty: Modern Warfare series with their Relative ADS Mouse Sensitivity.- This calculation will be affected by the change of the Actual VFOV of the aim you have selected.
- You can use negative values like -100%, which reverse the difference between 0% and 100% to calculate the same scale backwards.
- Scale will add a scaling factor to the conversion. So for instance 90% will make all conversions 10% shorter (i.e. slower).
- You can enter "auto" in the percentage field instead of a specific value. This tells the calculator to use the relationship between the input FOV and output FOV as the monitor distance. For example, when converting from 90 to 45 degrees, the result will be 50%. When converting from 120 to 30 degrees, the result will be 25%.
Monitor Distance - Dynamic (MDD)

This conversion method scales the monitor distance based on a limit (i.e., the maximum monitor distance throughout the scaling) and a power factor.
- Setting the power factor to 0 means that the scaling is equal to the limit, but the minimum accepted value is 1. The higher the power factor, the more the scale moves towards 0% scaling. Sensible power factors are between 10% and 300%.
- This method is ideal for those who find 0% scaling too slow for more powerful scopes but fine for ADS.
- You can visualize the scaling by using this graph.
- The original post has more in-depth information about this method, which was suggested by @TheNoobPolice.
Viewspeed - Horizontal

This is a dynamic conversion using the relation between the horizontal arc and chord to calculate the sensitivity. It will typically end up being close to MDH 70%.
- For more detailed information on this method, which was suggested by @DNAMTE, be sure to check out the original post.
Viewspeed - Vertical

This is a very complex dynamic calculation using the vertical axis, and will typically be close to MDV 133% or MDH 75%.
- This method was proposed by @Drimzi, and the original post provides additional in-depth information.
Jedi's Trick - Horizontal

This method is using the average 360 distance between MDH 0% and MDH 100% for the conversion.
- This method is non-reversible. Meaning you will not get the same result if you convert from A to B and back to A again.
- @MacSquirrel_Jedi is the source of this method, and you can find more detailed information about it, both horizontal and vertical, in the original post.
Jedi's Trick - Vertical

This is just like the horizontal version of Jedi's Trick, but it uses MDV instead.
Scale

The "Scale" option is only available for the Y axis sensitivity when it is set to "Custom". With this selection the Y axis will scale to the corresponding X axis using the scale.
Automatic Monitor Distance placeholders
For games that support the monitor distance coefficient, the value corresponding to the selected monitor distance, or the closest average value for viewspeed and Jedi's Trick, will be set as a placeholder for the coefficient. This is based on the scope settings only. The placeholder value can be overwritten by entering your own coefficient in the field, but using the calculated value is recommended.

Can someone explain to me exactly how to configure ads and scope of -100 and 100 pleace -


Instructions
in Technical Discussion
Posted
In the end with this configuration I feel comfortable, in apex I have 110 fov but if I put it at 95 in the configuration it gives me the real 110, if I put 110 it gives 123 and there is no that in apex so I put it at 95 so that it would give 110